
BalenaEtcher is a free and open-source software tool designed for creating bootable USB flash drives or SD cards from disk image files. It is widely recognized for its speed, reliability, and user-friendliness. BalenaEtcher is compatible with Windows, Linux, and macOS, making it a versatile choice for creating bootable media across different platforms...
Here are some features of BalenaEtcher:
User-Friendly Interface: BalenaEtcher boasts an intuitive graphical user interface (GUI) that simplifies the process of creating bootable drives, making it accessible to users of all experience levels.
Cross-Platform Compatibility: It is available for Windows, Linux, and macOS, ensuring broad compatibility with various operating systems.
Image Format Support: BalenaEtcher can write images in popular formats such as .iso, .img, and even .zip-compressed files, offering flexibility for different image sources.
Image Validation: Before writing an image, BalenaEtcher verifies its integrity, reducing the likelihood of creating bootable media with corrupted data.
Multi-Device Support: Users can write images to multiple drives or SD cards simultaneously, a valuable feature for tasks like setting up multiple devices with the same OS.
Persistent Storage: BalenaEtcher allows live SD cards or USB flash drives to be used as hard drives, providing a versatile storage solution.
Direct Raspberry Pi Support: It can directly flash Raspberry Pi devices that support USB device boot mode, simplifying the setup process for Raspberry Pi enthusiasts.
Command-Line Interface (CLI): In addition to the GUI, BalenaEtcher offers an actively developed command-line interface for users who prefer command-line tools.
Pros of Using BalenaEtcher:
High Speed: BalenaEtcher is known for its fast operation, ensuring that the process of creating bootable media is efficient and quick.
Safety and Reliability: The software protects users from accidentally writing to the wrong drive, ensuring data integrity, and reducing the risk of unintended data loss.
User-Friendly Interface: Its visually pleasing and intuitive interface makes the process of flashing SD cards or USB drives straightforward and pleasant.
Open Source: As an open-source tool, BalenaEtcher benefits from community contributions and constant improvement, ensuring it remains a valuable resource.
Cross-Platform Convenience: Its availability on multiple operating systems eliminates compatibility issues, offering a consistent experience to users on various platforms.
Future Enhancements: BalenaEtcher is actively developed, with plans for future improvements such as faster flash speeds and simultaneous writing for multiple drives.
No Cost: BalenaEtcher is entirely free to use, making it a cost-effective solution for creating bootable media.
In summary, BalenaEtcher is a popular choice for creating bootable media due to its user-friendly interface, cross-platform compatibility, image validation, and reliability. Its open-source nature, simplicity, and safety features make it a valuable tool for both beginners and experienced users in various scenarios, from flashing operating systems to setting up embedded systems.
Etcher - Changelog:
Patch: add sentry debug flag.
Patch: fix Sentry DSN for main process.
How to use balenaEtcher:
Here's a step-by-step guide on how to use BalenaEtcher to create a bootable USB drive:
- Download and Install BalenaEtcher:
Download the appropriate version for your operating system (Windows, macOS, or Linux).
Install BalenaEtcher by following the on-screen instructions. - Gather Your Materials:
Ensure you have a USB drive or SD card with sufficient storage capacity to accommodate the operating system or image you want to write. - Launch BalenaEtcher:
Open BalenaEtcher on your computer. You might need to provide administrator privileges or password depending on your system settings. - Select an Image File:
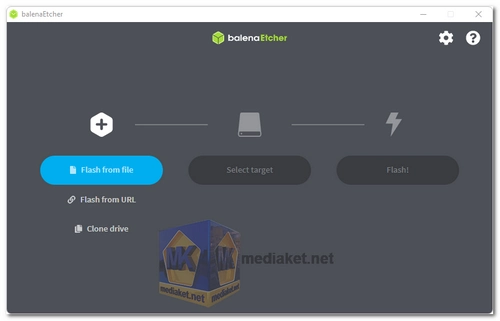
Click on the " Flash from file" button in BalenaEtcher's interface.
Navigate to the location of the operating system image file ((iso, bin, img...) you want to write, select it, and click "Open." - Choose the Target Drive:
Click on the "Select target" button.
- BalenaEtcher will automatically detect and display a list of available drives. Choose the USB drive or SD card you want to write the image to. Ensure you've selected the correct drive as the data on it will be overwritten. - Flash the Image:
After selecting the image file and target drive, click the "Flash!" button. BalenaEtcher will start writing the image to the selected drive. - Wait for the Process to Finish:
BalenaEtcher will display a progress bar showing the status of the flashing process. Wait for it to complete. The time it takes depends on the size of the image and the speed of your USB drive. - Validation (Optional):
BalenaEtcher will automatically validate the image after writing to ensure data integrity. This step helps prevent issues with corrupted bootable media. - Eject the Drive:
Once the process is complete and validation (if enabled) is successful, BalenaEtcher will display a success message.
Safely eject the USB drive or SD card from your computer. - Boot from the USB Drive:
Insert the bootable USB drive into the computer or device where you want to install the operating system.
Restart or power on the computer, and ensure it boots from the USB drive (you may need to access the BIOS or UEFI settings to set the boot order). - Follow the Installation Instructions:
Follow the on-screen instructions to install the operating system on your computer or perform any other tasks related to the bootable media.
BalenaEtcher's user-friendly interface and automatic drive selection make it a convenient tool for creating bootable USB drives. Just ensure that you select the correct image file and target drive to avoid data loss.
Download balenaEtcher:
Install version:
Size: 149.69 MB - Download
Portable version:
Size: 153.80 MB - Download